Ola is one of the most popular ride-hailing services in India. It is known for its ease of use, affordability, and safety. However, many users are not aware that they can book Ola with multiple stops. This feature allows users to add additional stops during their ride, which can be very useful if you have to make a few stops before reaching your final destination. In this article, we will discuss how to book Ola with multiple stops.
Book Ola with Multiple Stops In 13 Steps
Step 1:Open Ola app – To book Ola with multiple stops, you need to have the Ola app installed on your phone. Open the Ola app and log in to your account. If you don’t have an account, you can create one by providing your mobile number and verifying it.

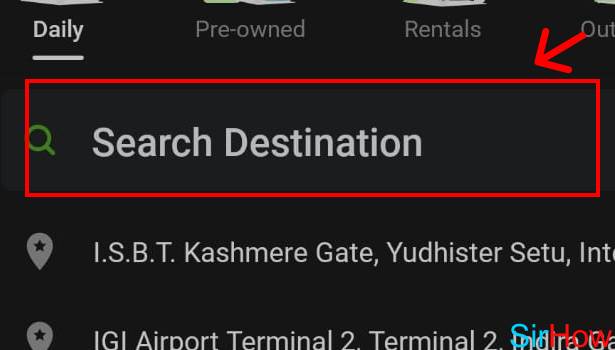
Step 2:Tap on “Search destination” – Once you are logged in, you will see the home screen of the Ola app. Tap on “Search destination” to start booking your ride.
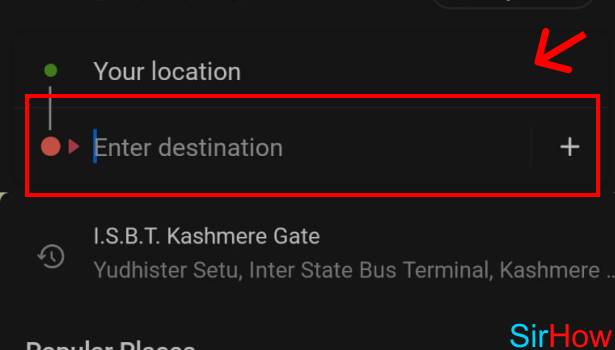
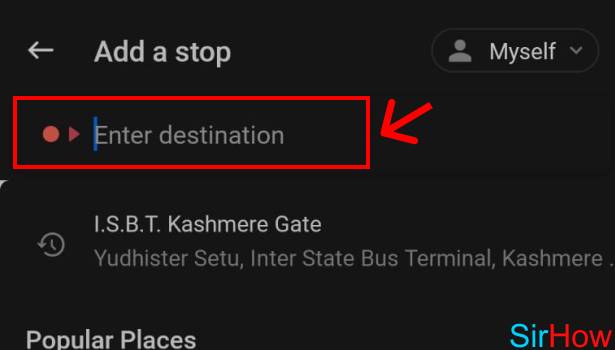
Step 3: Enter destination – Enter your first destination in the search bar. This can be your first stop or your final destination.
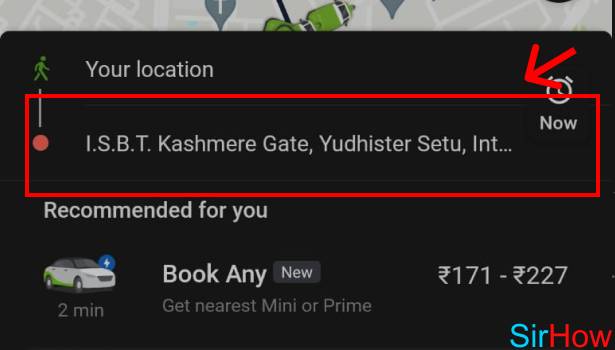
Step 4:Select destination – Once you have entered the destination, the Ola app will show you the location on the map. Select the destination by tapping on it.
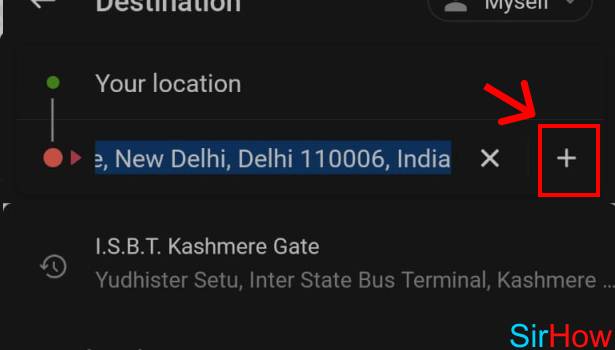
Step 5:Tap on (+plus) icon – After selecting the first destination, you will see a (+plus) icon at the bottom of the screen. Tap on the (+plus) icon to add another destination.
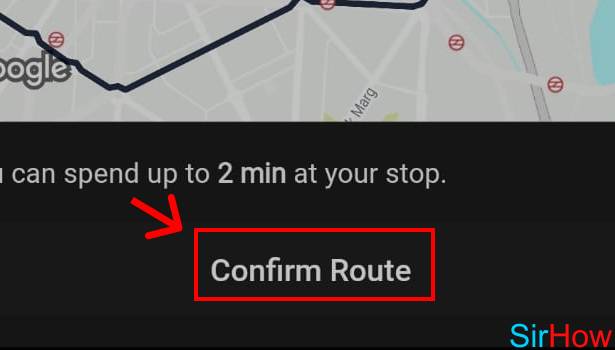
Step 6:Tap on “Confirm Route” – Enter the second destination in the search bar and select it from the map. Tap on “Confirm Route” to add the second stop.
Step 7:Enter destination – You can add more stops by tapping on the (+plus) icon again and entering the destination. You can add up to three stops in total.
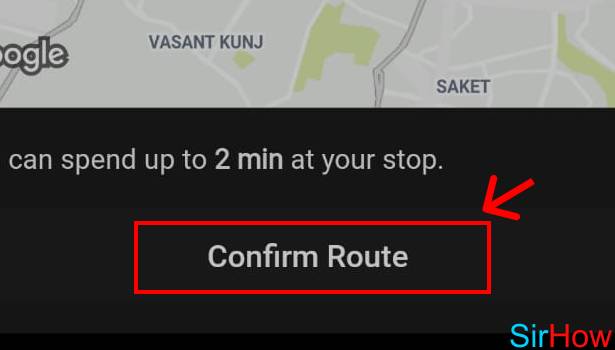
Step 8: Tap on “Confirm Route” – Once you have added all the stops, tap on “Confirm Route” to proceed with the booking.
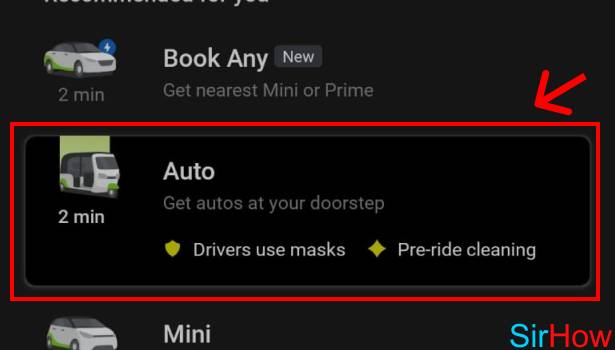
Step 9:Tap on “Auto” – You will be asked to select the type of ride you want. Tap on “Auto” if you want to book an auto-rickshaw.
Step 10:Tap on “Book Auto” – Select the type of auto you want to book and tap on “Book Auto.”

Step 11: Tap on “Remind me later” – If you want to schedule the ride for a later time, you can tap on “Remind me later” and select the time you want the ride to arrive.

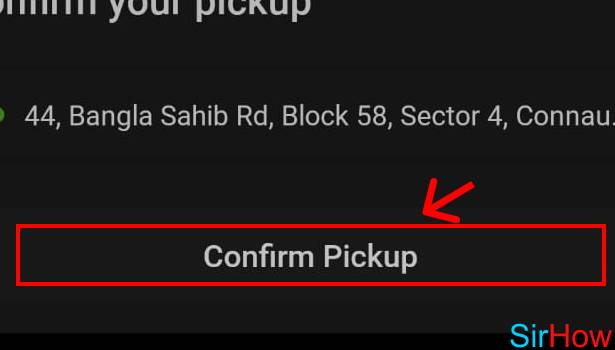
Step 12: Tap on “Confirm Pickup” – Enter the pickup location and tap on “Confirm Pickup.”
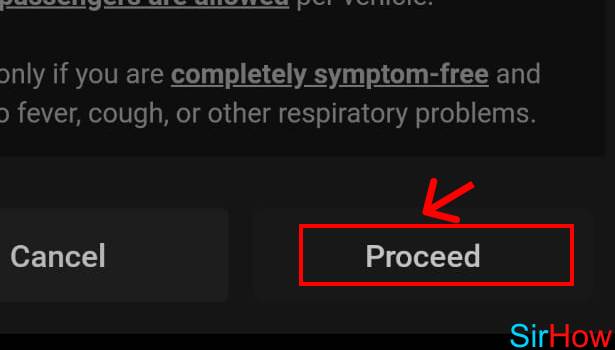
Step 13: Tap on “proceed” – Review the details of your booking and tap on “proceed” to confirm the booking.
Conclusion:
Booking Ola with multiple stops is a useful feature that can save you time and effort. By following the steps outlined in this article, you can easily add multiple stops to your Ola ride. Whether you need to make a quick stop at the grocery store or want to drop off a friend on the way, Ola with multiple stops has got you covered.
FAQ
Q1. How many stops can I add to my Ola ride?
A: You can add up to three stops to your Ola ride.
Q2. Can I change the stops after booking the ride?
A: No, you cannot change the stops after booking the ride. You will have to cancel the ride and book a new one.
Q3. Will I be charged extra for adding multiple stops?
A: Yes, you will be charged extra for adding multiple stops. The fare will depend on the distance and time taken to cover all the stops.