Ola, one of the leading ride-hailing companies in India, has been providing affordable transportation services to millions of people since its inception. While Ola cabs are quite popular, many people are not aware of how to book an Ola auto. If you’re one of them, then worry not, as we’ve got you covered. In this article, we will guide you through the steps involved in booking an Ola auto.
Book Ola Auto In 7 Steps
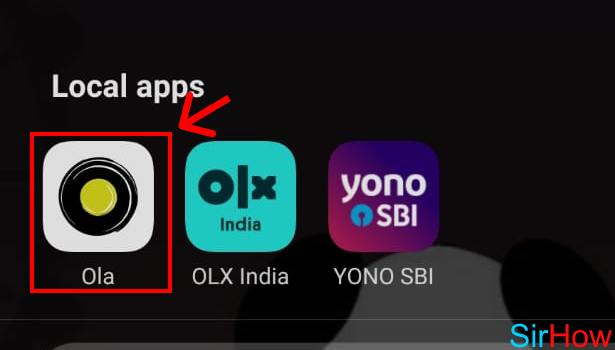
Step 1: Open Ola app – The first step to booking an Ola auto is to open the Ola app on your smartphone. If you haven’t already downloaded the app, you can do so from the Google Play Store or Apple App Store.
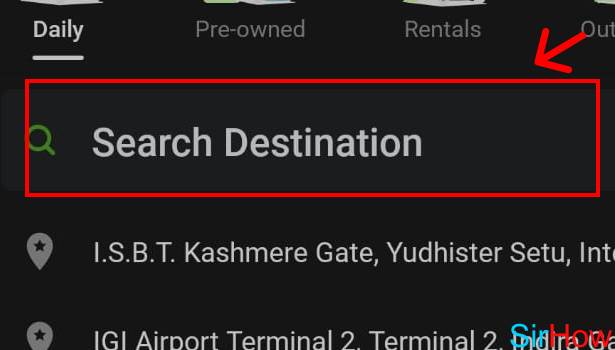
Step 2:Tap on “Search destination” – Once you have opened the Ola app, you will see a map of your current location. To book an Ola auto, you need to tap on the “Search destination” button, which is located at the bottom of the screen.
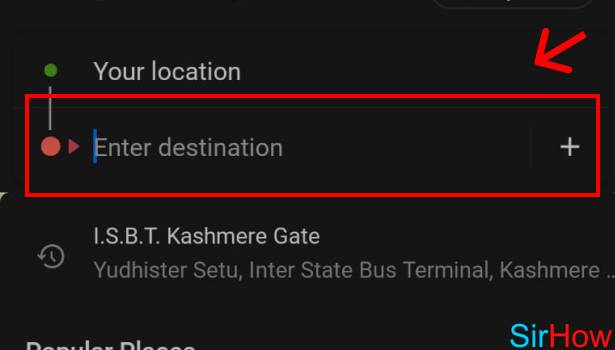
Step 3:Enter location – After tapping on the “Search destination” button, you will be directed to a screen where you can enter your destination. You can either type in the name of your destination or choose it from the list of popular locations.
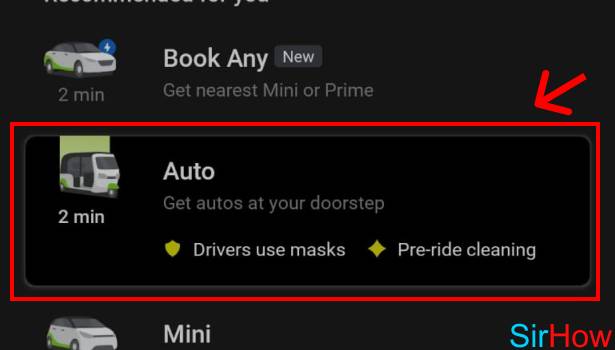
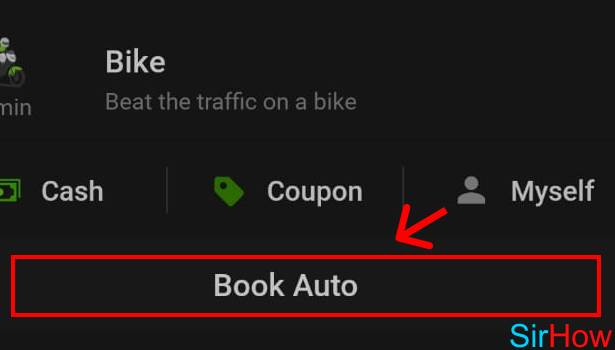
Step 4:Tap on auto – Once you have entered your destination, you will see a list of available ride options. To book an Ola auto, you need to tap on the “Auto” option.
Step 5:Tap on “Book Auto” – After selecting the auto option, you will see a screen that shows you the estimated fare and the time it will take for the auto to reach your location. To book the auto, you need to tap on the “Book Auto” button.
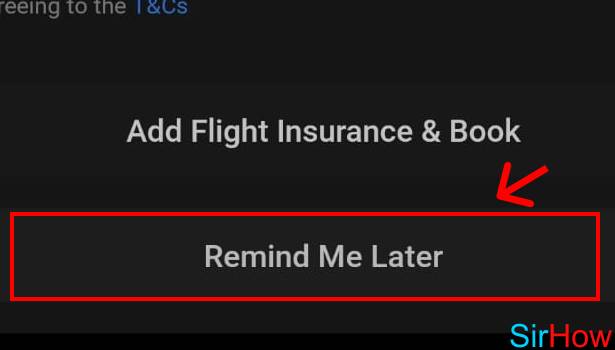
Step 6:Tap on “Remind me later” – In case you’re not ready to take the ride immediately, you can tap on the “Remind me later” button. This will set a reminder for you, and you will receive a notification when the auto is nearby.
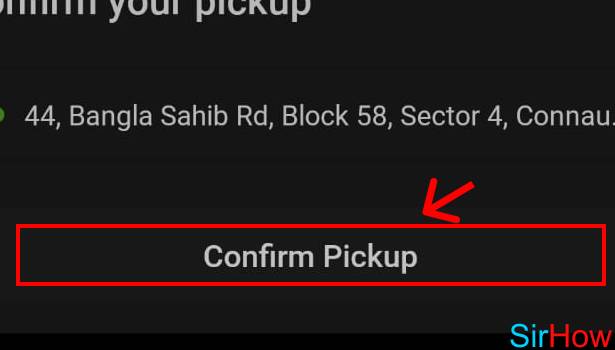
Step 7:Tap on “Confirm” – If you’re ready to take the ride, you need to tap on the “Confirm” button. This will confirm your booking, and the Ola auto driver will be notified of your request.
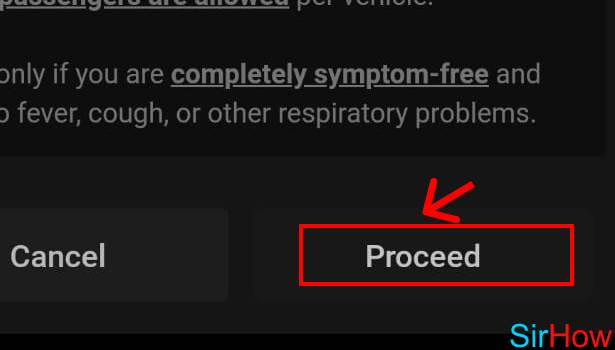
Step 8:Tap on “Proceed” – After confirming your booking, you will see a screen that shows you the driver’s details, including their name, photo, and vehicle number. You need to tap on the “Proceed” button to start the ride.
Conclusion:
Booking an Ola auto is a simple and straightforward process that can be completed in just a few steps. By following the above-mentioned steps, you can easily book an Ola auto and enjoy a comfortable ride to your destination.
FAQ
Q1. Can I cancel my Ola auto booking?
Yes, you can cancel your Ola auto booking at any time before the ride starts. To cancel the booking, you need to open the Ola app, go to the “Rides” section, and select the booking you want to cancel. Then, tap on the “Cancel” button.
Q2. How do I pay for my Ola auto ride?
You can pay for your Ola auto ride using any of the payment methods available on the Ola app, such as Ola Money, debit or credit card, UPI, or cash.
Q3. Can I book an Ola auto for someone else?
Yes, you can book an Ola auto for someone else using the Ola app. To do so, you need to enter the destination details and the rider’s phone number during the booking process.
Q4. Is it safe to take an Ola auto?
Yes, Ola takes the safety and security.